How to Make Yogurt at Home
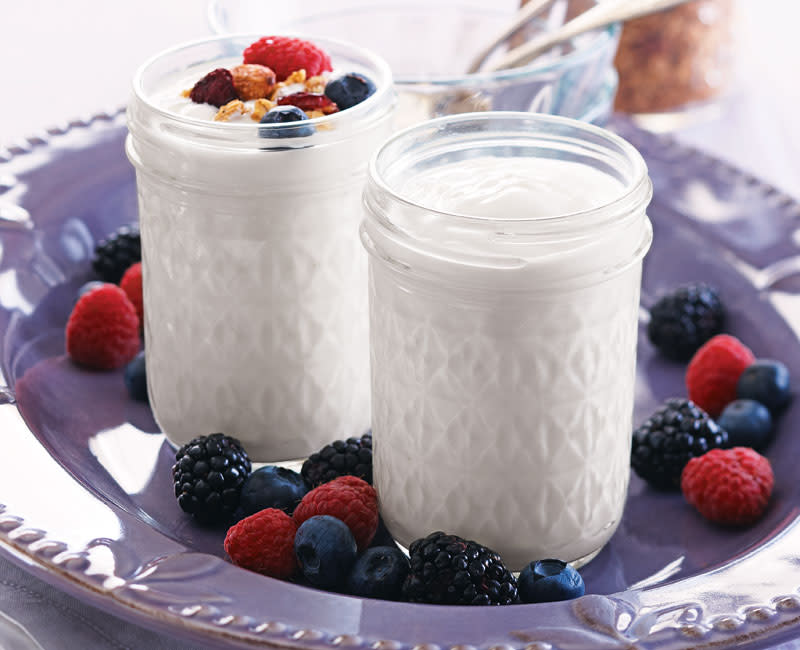
Creamy homemade yogurt is so luscious in taste and texture, and so simple to make, once you try it, you may never purchase it again.
(Note: As an Amazon Associate, we earn from qualifying purchases made through affiliate links.)
A stroll through the dairy section of your local supermarket reveals nearly endless varieties of yogurt. But pick up a container, scan the ingredient list and nutritional information, and you’ll see that choice of flavor and fat content are almost the only control you have.
When you make yogurt at home, you control everything about it — quality and quantity of ingredients, thickness, and tartness. You can keep the ingredients simple and your yogurt will taste just as good, if not better. A standard 6-ounce portion of purchased plain yogurt often contains 12 grams of sugar, while a 6-ounce portion of this homemade yogurt has just 8 grams. Many national yogurt brands add corn syrup, cornstarch, and pectin to their products, which you can choose to leave out.
All you need to begin your yogurt-making journey are a few ingredients, a heat source, and a thorough guide (read this one fully before picking up that milk!).
The Science: What is Yogurt?
Yogurt is simply fermented milk. While that may not sound appetizing, the same types of bacteria that already exist in your gastrointestinal system are added to the milk to make yogurt, which is why yogurt is considered a probiotic food. This bacteria, in the form of a yogurt culture or starter, feeds on the sugar in milk, fermenting or souring it.
The bacteria in the cultures are finicky and are most comfortable dining (or incubating) for five to 10 hours (seven is average; the longer the incubation, the tangier the yogurt) between 98°–130°F. Temps above 130° kill the bacteria and those below 98° cause them to be sluggish, resulting in yogurt that’s still milk-like because the bacteria hasn’t consumed the milk sugar to turn it into yogurt. (If this happens, throw it out and start over.)
What You Need for Making Yogurt at Home

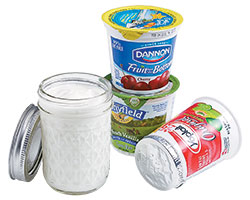
Starter: Plain, store-bought yogurt or freeze-dried packets of yogurt cultures, are inexpensive starters. Use fresh yogurt (that’s far from its expiration) and one touting at least three live active cultures. Stonyfield Farm, with six live active cultures, is an excellent starter. After your first batch, reserve some homemade yogurt to use as the starter for your next batch.
Different yogurt cultures produce different yogurts. Commercial yogurts used as a starter, like Stonyfield or Dannon, produce mild-flavored, thinner yogurts. Freeze-dried cultures tend to yield thicker, tangier yogurt, and will state on the package what type of yogurt — thick or thin — they’ll produce.
Milk: Nearly any type of dairy milk with any fat content will work to make yogurt. In the Test Kitchen, low- and whole-fat cow’s milk was preferred, but goat milk works, too. And we found that organic milk or that from local dairies that hadn’t been ultra-pasteurized produced the creamiest yogurt. The ultra-pasteurized milks sometimes produced a sticky, stringy yogurt.
Thickeners: Many commercial yogurts use pectin to make them thick and creamy. You can add pectin to the yogurt you make, but nonfat dry milk is an excellent (and inexpensive) thickener. It gives the yogurt more body, making it creamier.
Heat Source: Machines made just for incubating yogurt are convenient, but plenty of options exist to “MacGyver” comparable incubators from items you already own (see our “DIY or Buy” guide, below). If you choose one of the DIY methods, keep a closer eye on your yogurt than if you use a machine purchased specifically for yogurt making.
The Yogurt Maker: DIY or Buy?
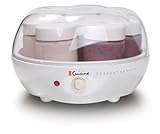 Yogurt Makers: Designed only for incubating yogurt, these machines come with six to eight glass or plastic containers with snug-fitting lids that pop right into the machine. A good choice is the Euro Cuisine Yogurt Maker. Once turned on, these machines will maintain the precise temperature of 122°F for the entire incubating period. Some come with bells and whistles, like timers and automatic shut-offs at the end of the preset time.
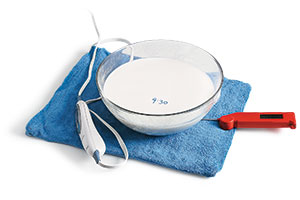 Heating Pad: A heating pad used for common medical ailments makes a great yogurt incubator. It allows the use of a variety of containers for incubating. Simply set the covered container(s) of yogurt on a preheated heating pad, then cover the yogurt with a towel and incubate for the preferred amount of time. To double check that the temperature isn’t too high or too low, place a thermometer under the bowl to get a reading and adjust the heat settings accordingly. In the Test Kitchen, we found medium heat kept our yogurt in the ideal zone, and jotting down the time we started incubating was a good idea.
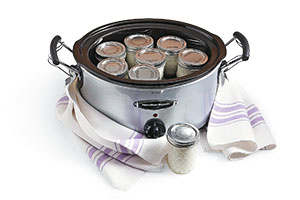 Slow Cooker or Instant Pot: Convert an 8-quart slow cooker into an incubator by heating it on the warm setting. We like slow cookers. Insert yogurt-filled jars, and pour warm water in the cooker so it comes halfway up the sides of the jars. Cover the cooker and check the temperature of the water every hour or two to see that it stays at 115°–125°F. If the temperature climbs above 125°, turn the machine off, and wrap it in a large bath towel to maintain the temperature for the duration of the incubation time.
The Instant Pot also makes incubation easy with a special program just for making yogurt. Simply place yogurt-filled jars into the Instant Pot, close the lid, and push the “Yogurt” button. The display will show 08:00 for 8 hours of incubation (or push the “+” or “-” buttons for more or less time). The Pot will automatically hold the correct temperature.
How to Make Yogurt at Home
Grab our recipe for Homemade Yogurt and follow along with the steps below.
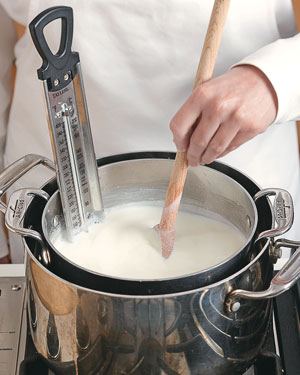
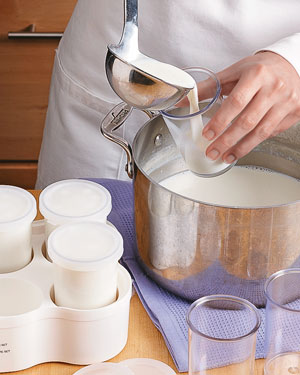
Step 1: Heat milk with nonfat dry milk to 185°F in a double boiler. Heating milk kills microorganisms in it that can compete with bacteria in the yogurt cultures you'll add to it.
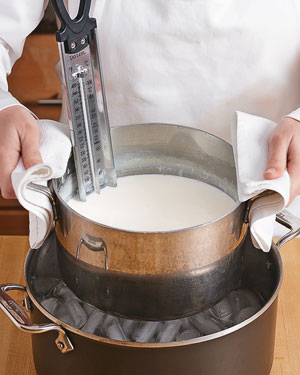
Step 2: Chill milk to 115°F. Milk cools fastest in an ice bath, but cooling at room temperature, stirring periodically, works too.
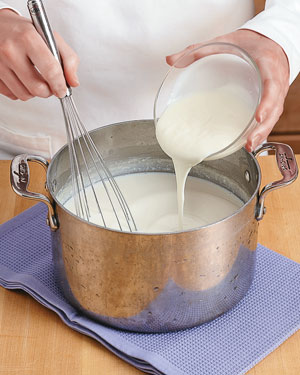
Step 3: Whisk in yogurt or yogurt starter when milk cools to 110°F. Whisk starter into the cooled milk just until incorporated, then transfer mixture to airtight incubating containers.
Step 4: Incubate yogurt between 98°–130°F for the bacteria to feed on the sugars in the milk. The optimal temperature is 122°F. Incubate for five to 10 hours (seven is average; the longer the incubation, the tangier the yogurt).
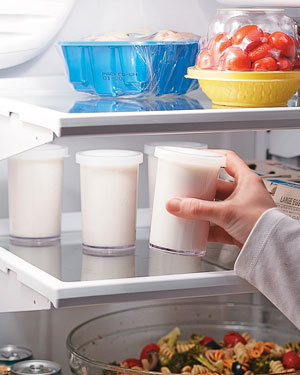
Step 5: After the yogurt ripens during incubation, you need to chill it so the bacteria stops feeding and the yogurt thickens. Refrigerate yogurt at least 8 hours before eating.
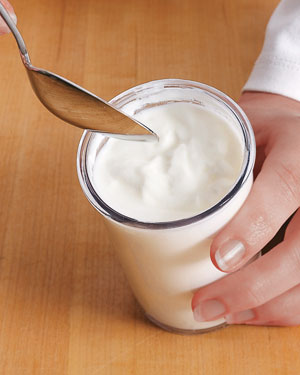
Step 6: When you open chilled yogurt, you’ll sometimes notice a yellowish liquid on top. That’s the whey. Either simply stir it back into the yogurt, or pour it off and discard.
How to Make Greek Yogurt and Yogurt Cheese
Strained yogurt, such as Greek-style yogurt and yogurt cheese, is very popular. Make it at home by separating the whey from the solids in one of three ways:
- Buy a yogurt cheese maker or Greek yogurt maker, a simple contraption that looks like a coffee filter and costs about $15–25. Pour the yogurt in, and place it in your fridge.
- Pour yogurt into a cheesecloth-lined colander and set the colander in a bowl so the whey drains into the bowl.
- Gather three layers of cheesecloth, tie it with kitchen string, and hang it from your faucet so the whey drips down the drain.
For Greek-style yogurt: Strain yogurt 2 to 3 hours to achieve the pudding-like consistency Greek yogurt is known for. It’s a great stand-in for sour cream.
For yogurt cheese: Strain yogurt 8 to 24 hours (in the fridge) to remove nearly all the liquid. The solids will be spreadable like cream cheese.
How to Add Flavor to Homemade Yogurt
Plain yogurt is just the beginning. After you discover how easy yogurt is to make, you’ll be ready to flex your “flavor” muscles.
If the pucker power of plain, unsweetened yogurt is too much, add a tablespoon or two of honey or maple syrup to the milk before heating it.
Stir liquid flavoring agents like pure vanilla or almond extract and instant espresso powder or concentrated coffee into the milk (to taste) just before heating.
Jams, jellies and preserves introduce flavor and simulate the “fruit on the bottom” of commercial yogurts. Add them to the bottom of the jars just before incubating. (Check out our article on How to Make Homemade Preserves.)
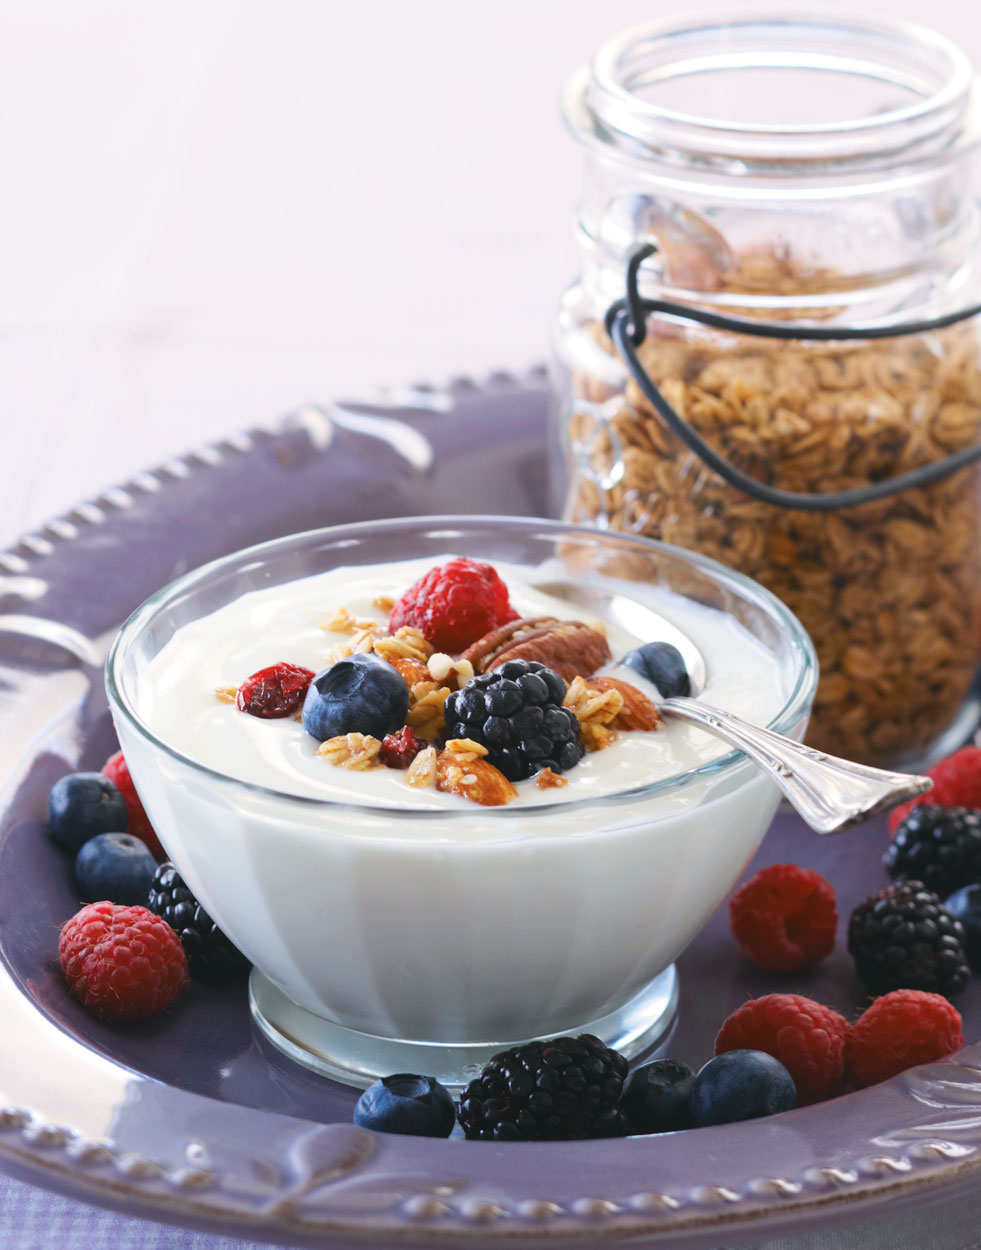
Add fresh fruit to yogurt only after it’s ready-to-serve.
Yogurt Recipes
Check out our recipe for homemade yogurt, plus our favorite yogurt applications:
- Homemade Yogurt
- Beet & Berries Smoothie Bowls with bee pollen
- Tropical Fruit Salad with honeyed yogurt
- Cherry Frozen Yogurt Sundaes with root beer syrup
Like this article? Check out all of our How-To Cooking Articles & Videos, here.
Product Recommendations
Interested in cooking? Need some supplies?
Check out some of the tools we like. All products featured on Cuisine at Home are independently selected by our editors; we may earn an affiliate commission from qualifying purchases through our links.
Comments ()