How to Make Homemade Preserves
Savor the fruits of summer all year long by “putting up” your favorites using this step-by-step tutorial guide on How to Make Homemade Preserves. Want some fun and flavorful ideas? Grab these recipes and put up our gourmet jam (Strawberry-Balsamic Jam), jelly (Vanilla-Cardamom Plum Jelly), and butter (Gingered Peach Butter) — any or all.
(Note: As an Amazon Associate, we earn from qualifying purchases made through affiliate links.)
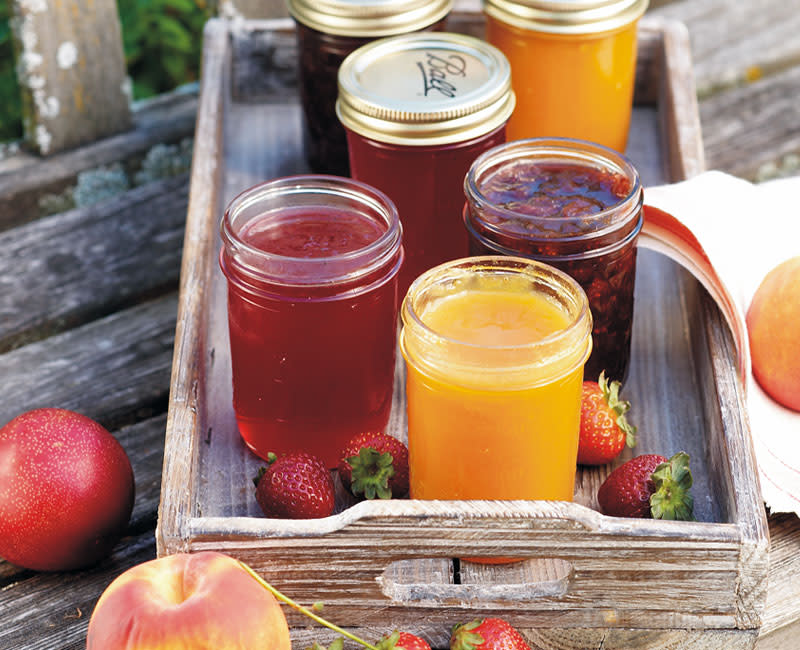
This summer, extend the fresh-fruit season with three distinctly different preserves. Fresh peaches cook down to a smooth, buttery spread enlivened by the sweet-hot taste of ginger. Juicy plums combine with spicy cardamom and mellow vanilla to make a one-of-a-kind jelly. Finally, sun-ripened strawberries turn into a lush jam subtly enhanced by a hint of balsamic vinegar. We think you’ll agree that these preserves are well worth the effort of a multistep process—especially when you taste the enduring fruits of your labor.
What You’ll Need
Gather clean canning jars that are free from cracks or nicks. Use half-pint (8 oz. or 250 ml) and half-cup (4 oz. or 125 ml) jars for jams and sweet spreads. A breakdown of gel can occur during the longer cooling times required for larger jars. For each jar, you’ll need a two-piece lid, consisting of a screw band and a flat lid with sealing compound. Jars and screw bands can be reused, but use flat lids only once and then discard them when the jar is emptied. You’ll also need a large pot or canner no more than 4 inches wider than the stove burner.
How To Make Homemade Preserves: The Steps
Getting Started: To process these preserves, we used a combination of heat and sugar. The boiling water destroys molds, yeasts, and most bacteria while the sugar traps water in the food, creating an environment where micro-organisms can’t grow.
Cleaning Jars: Jars don’t need to be sterilized before filling, but they should be clean and hot so they won’t crack when filled. The flat lids (not the screw bands) need to be heated as well in order to soften the sealing compound. About 20 minutes before processing preserves, place empty jars on the rack in the canner. Add hot water until jars are covered. Cover canner and keep water hot over a low flame. Dip the lids in hot water about 5 minutes before filling the jars. Remove jars from hot water, drain, and place them upside down on a cooling rack to drip dry. Jars also can be heated in a dishwasher.
Filling Jars: Process the preserves while both the jars and the preserves are hot. Fill hot jars with hot preserves using a ladle and funnel. A small pitcher or measuring cup also can be used for filling. Fill jars to within ¼ inch of the rim. Wipe the rim and side of each jar with a clean cloth dipped in hot water.
Processing Jars: After wiping the rim and side of the filled jar, remove a flat lid from hot water and center it over the rim of the jar. Tighten a screw band over the flat lid. You want it to be tight enough to form a good seal, but not overly tight. Using the jar lifter, return the filled jar to the rack in the canner. If necessary, add more hot water to the canner until all jars are covered by 1 inch. Cover the canner with a tight-fitting lid and bring the water to a rolling boil. Start the processing time called for in the recipe when the water has come to a steady boil. When the processing time is finished, turn off the heat and remove the canner lid. Allow jars to remain in the hot water for 5 minutes to stabilize pressure. Remove jars from the canner; place on a towel. Let the jars rest undisturbed for at least 12 hours.
Storing Preserves: To check whether the jars have sealed, look to see if the lids are indented; there should be no give at all when you press down on the lids with your finger. Any jars that haven’t sealed can be refrigerated and the contents used within three weeks. Label each jar with its contents and the date. Store preserves in a dark, cool place. Before eating food from a processed jar, check for any signs of spoilage, like a bulging lid. If the food has mold or “off” flavors, discard it. As long as the seal remains airtight, filled jars can be stored without refrigeration for as long as one year.
Canning Equipment Basics
Today’s preserving methods are simpler than days past, thanks to innovations made by jar manufacturers. Jars now are available in many sizes, and several tools have been designed to streamline small-batch preserving.
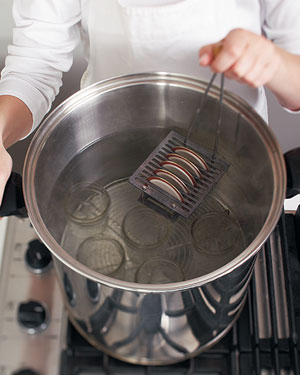
Any large, deep pot with a tight-fitting lid and pot rack will work as a canner. A lid rack (shown here) is useful for dipping flat lids in hot water. Lids also can be heated in a pan of hot water on the stove top.
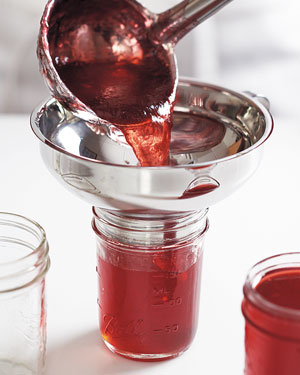
Using a funnel and ladle is the easiest way to pour hot liquid into hot jars. Wipe the jar rims after filling. Clean rims are important—any particles could interfere with forming a vacuum seal.
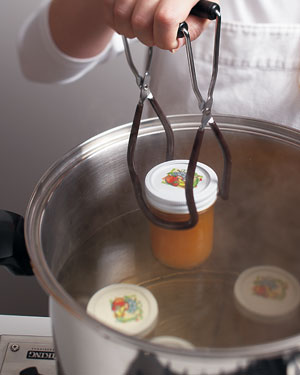
If the pot rack doesn’t have handles, a jar lifter is necessary for removing and returning jars to water. Lift filled jars straight up and don’t tip—sloshing liquid could prevent lids from sealing.
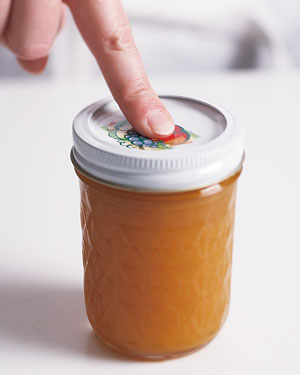
After jars have cooled, press down on each lid to check for sealing. The lid shouldn’t give or pop when pressed.

A POT RACK is essential for canning to allow water to flow under jars. If your large pot doesn’t come with a rack, use a round cooling rack, or fashion your own by tying several screw bands together with kitchen twine.
Product Recommendations
Interested in cooking? Need some supplies?
Check out some of the tools we like. All products featured on Cuisine at Home are independently selected by our editors; we may earn an affiliate commission from qualifying purchases through our links.