Canning with Confidence: How to Can with a Water Bath
Vegetable season is ending, so take advantage of your garden-fresh beauties or farmers' market finds through the process of canning. Canning seems to get a bad rap. And to some people it’s intimidating. But not anymore! We’re going to walk you through the simple process of water bath canning, and debunk the seemingly daunting steps that come with this craft.

(Note: This post contains affiliate links. As an Amazon Associate, we earn from qualifying purchases made through affiliate links.)
We’re not going to tell you that canning is a walk in the park. Canning does take a lot of prep work and time, but in the end you’ll reap the benefits of your garden all year long.
We’re specifically focusing on the water-bath canning method here. This procedure processes the jars in a large covered cooking pot, outfitted with a rack, while the jars are totally submerged in water.
Two important things to keep in mind – do not alter canning recipes. Altering ingredients changes the acidity level, which impacts the processing times. Secondly, always use ripe, yet firm, unblemished fruits and vegetables. Now let’s have some fun and get to canning!
Essential Supplies for Canning
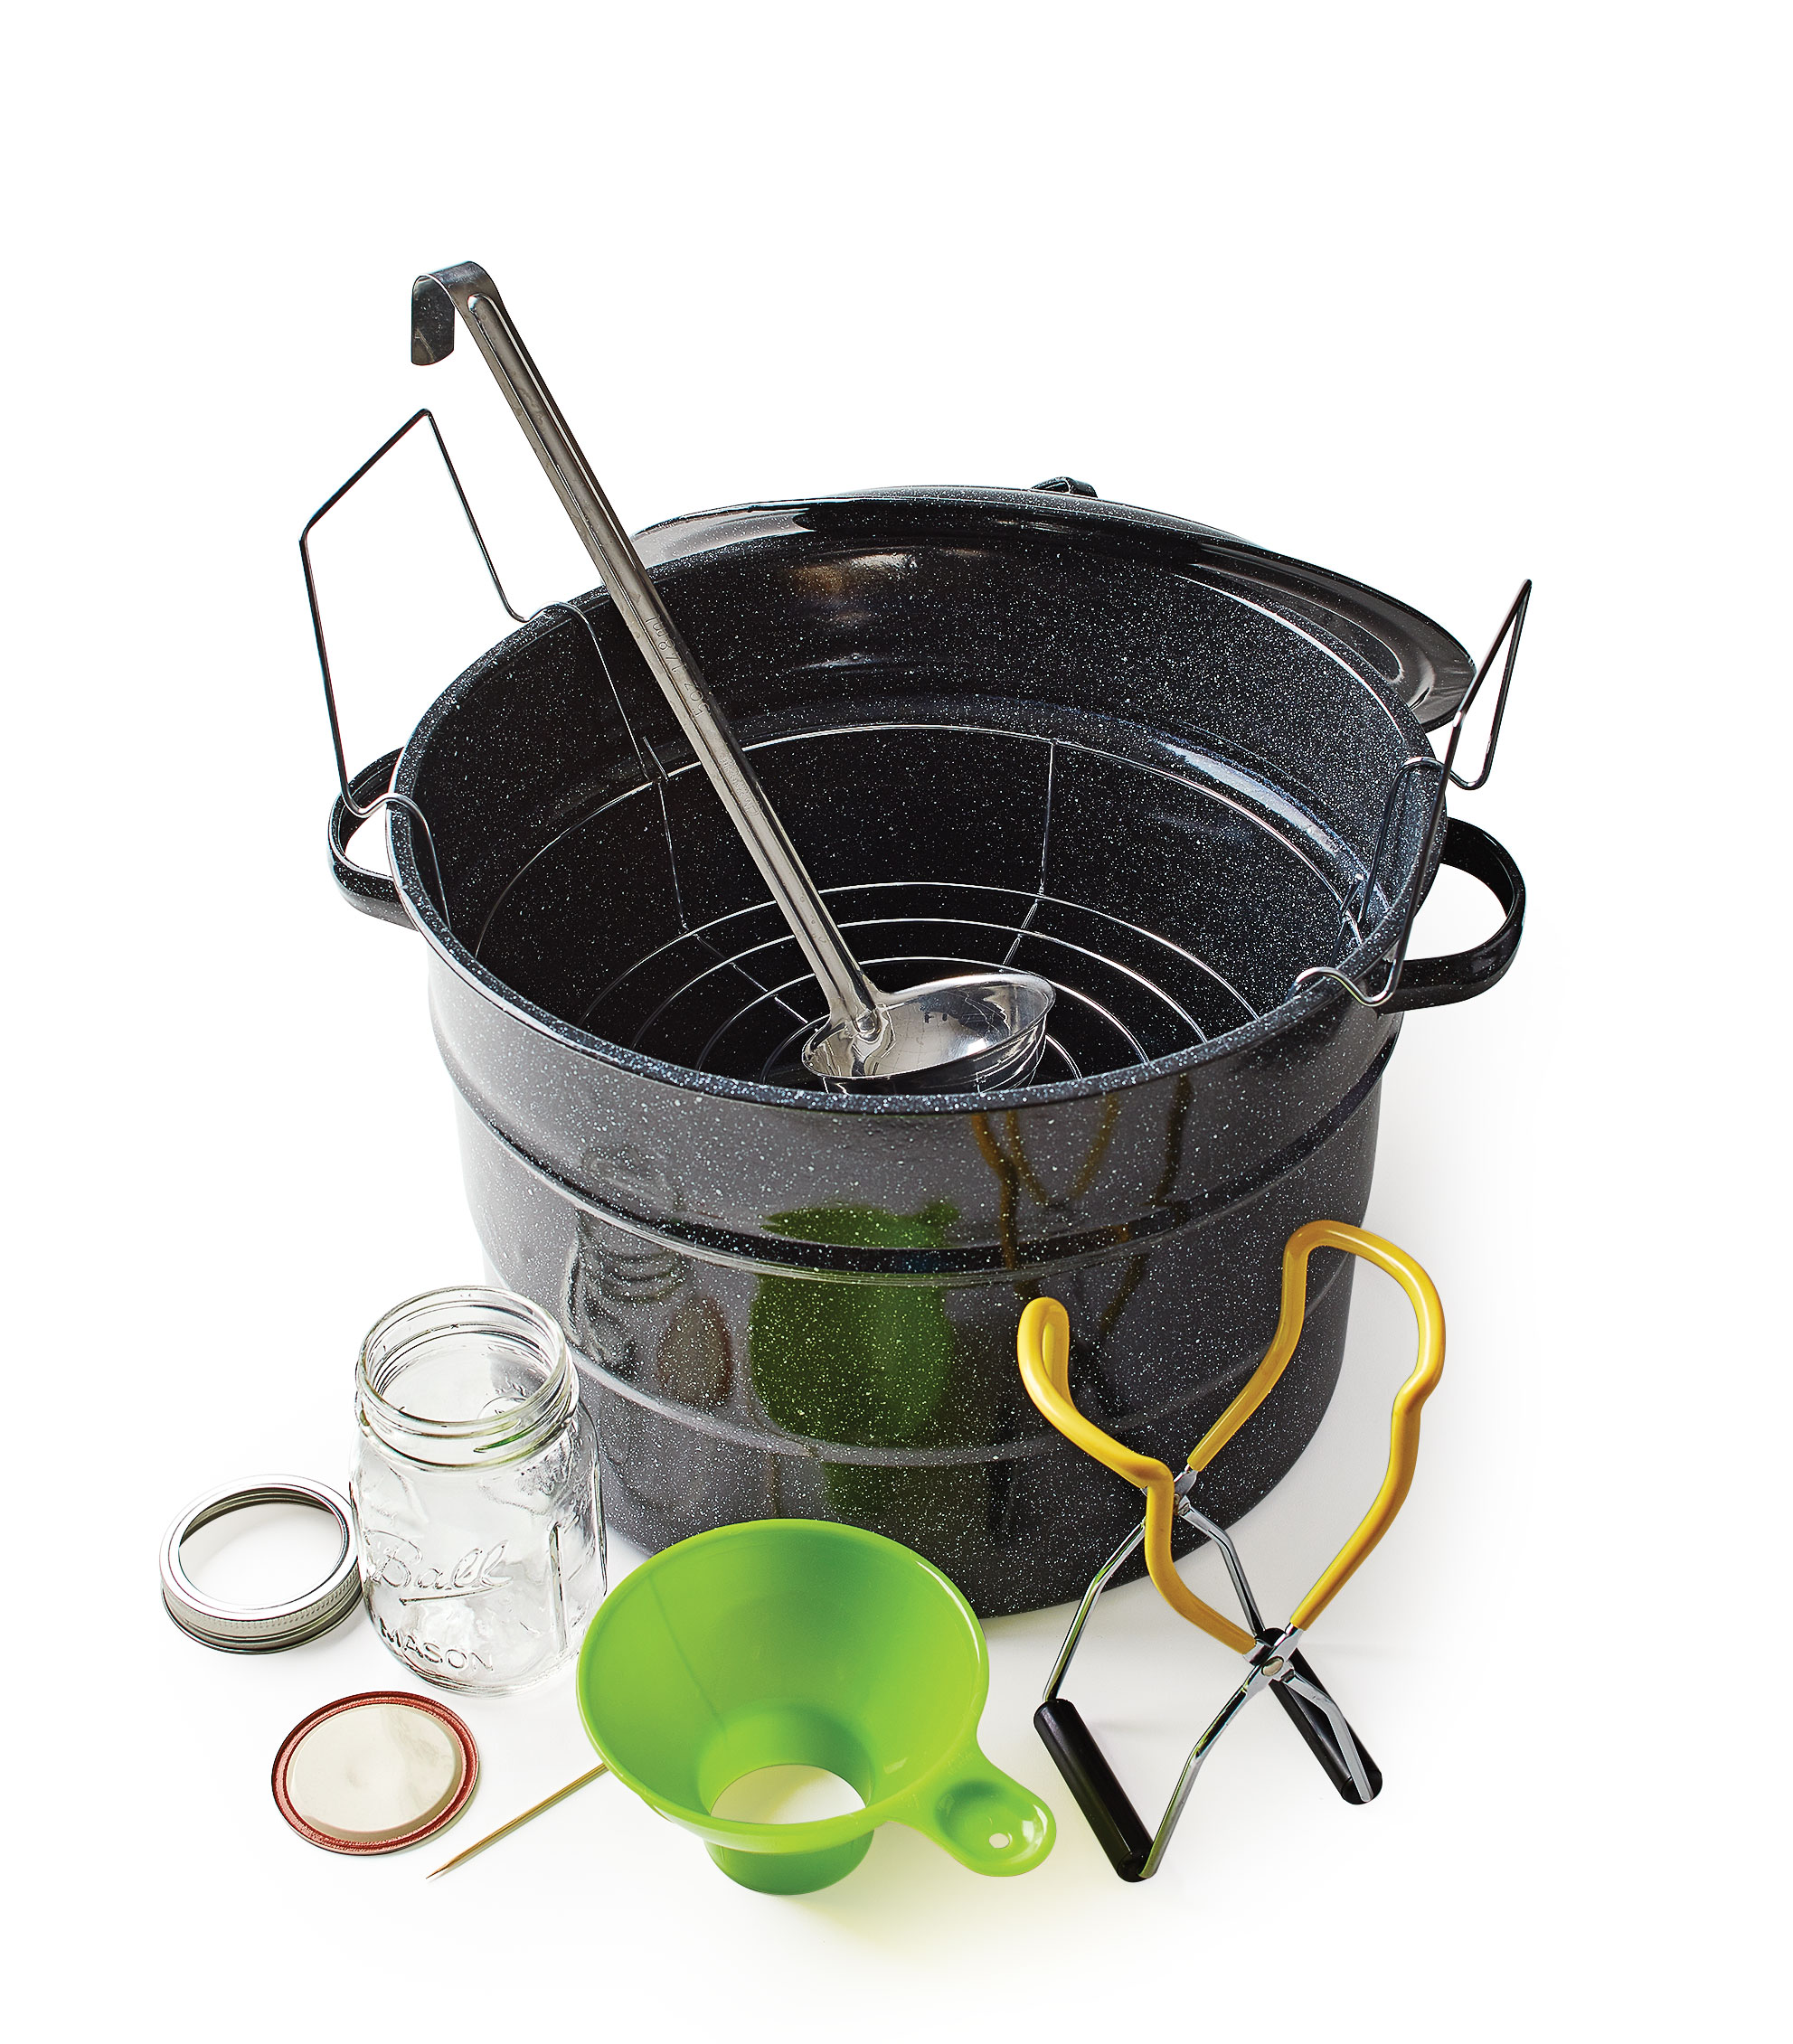
- Ladle
- Water bath canner with wire rack
- Jar lifter
- Wide-mouth funnel
- Bubble freer
- Glass preserving jars, lids, and bands
If you don’t have a water bath canner, don’t sweat it. A large, deep stockpot with a lid will work too. If using a stockpot, you’ll need to find a round wire rack to place inside the stockpot to keep the jars off the bottom
Steps for Canning
Before starting, check the jars, lids, and bands for proper functioning. Jars with nicks, cracks, and uneven rims can prevent sealing or cause jar breakage.
Step 1: Fill the water bath canner at least half-full with water. Cover and maintain a simmer until jars are filled and ready to can.
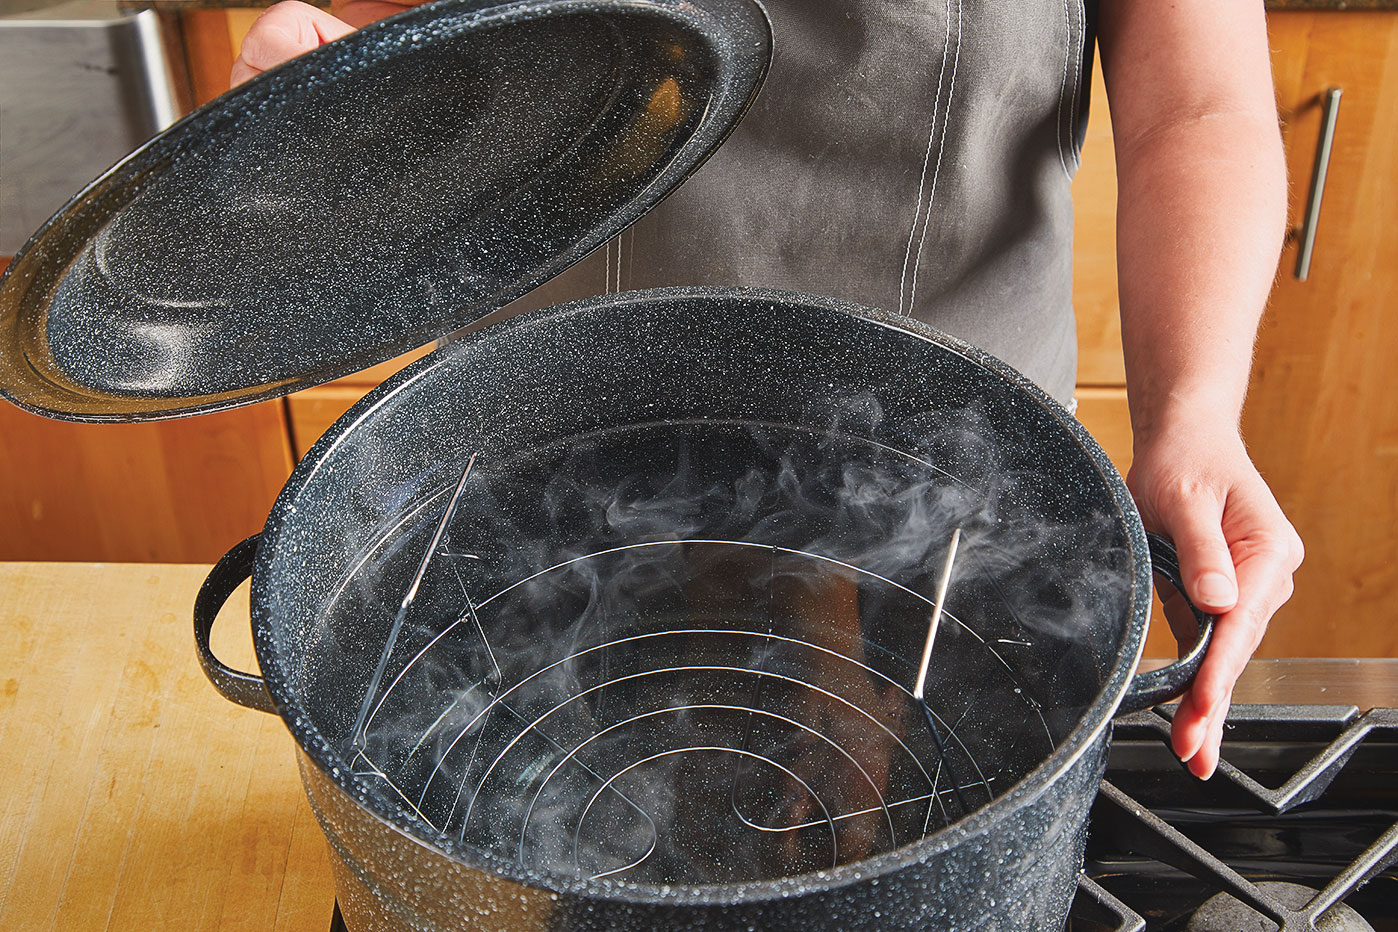
Step 2: Wash jars, lids, and bands in hot soapy water and dry well. Then, preheat your jars by adding them to the canner.
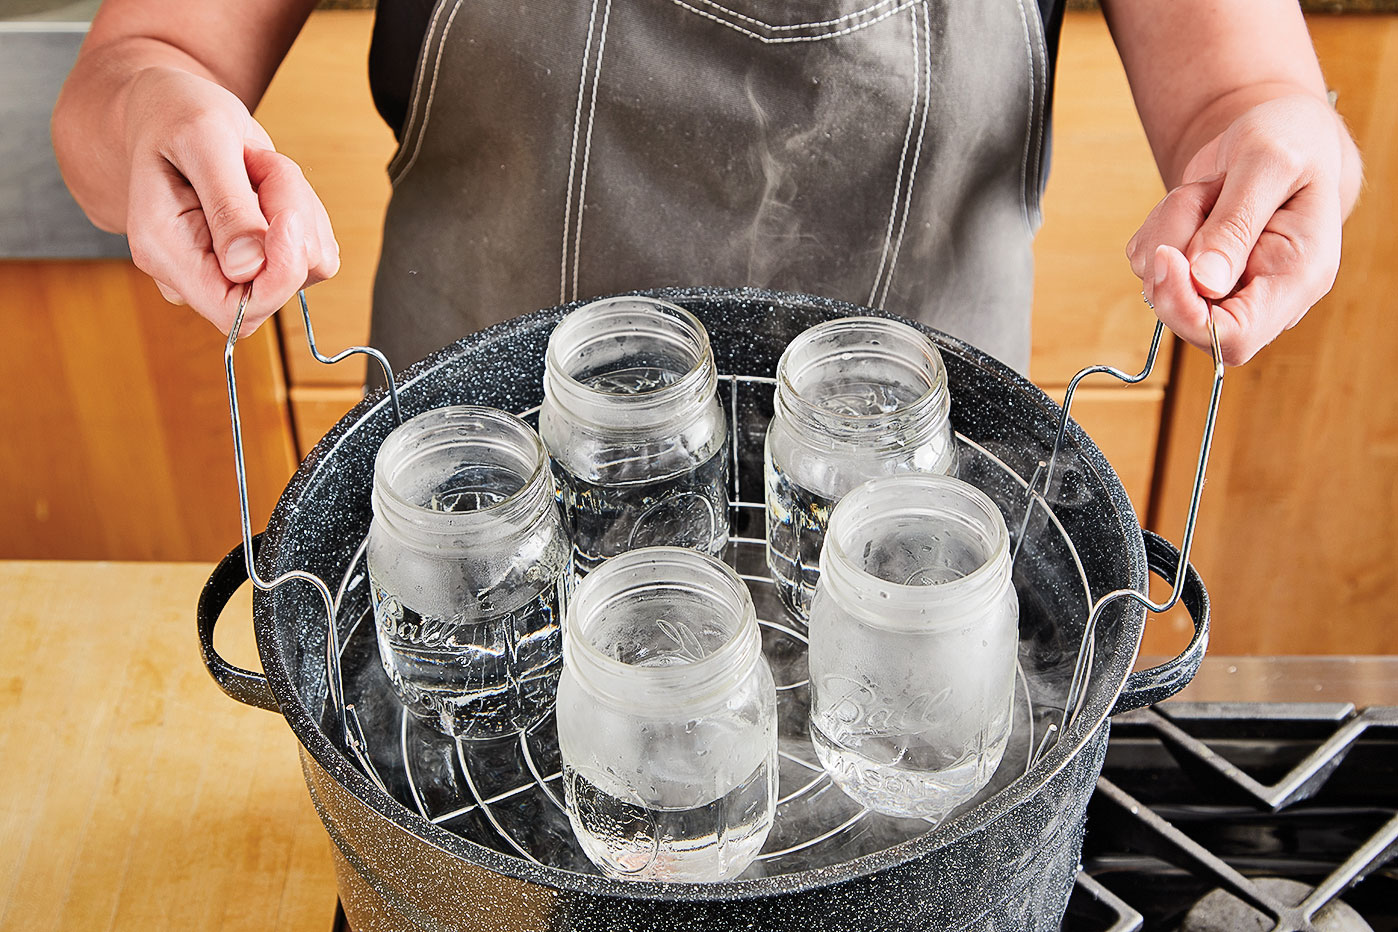
Step 3: Use a jar lifter to remove preheated jars, being careful to empty the water out of the jars back into the water bath canner.
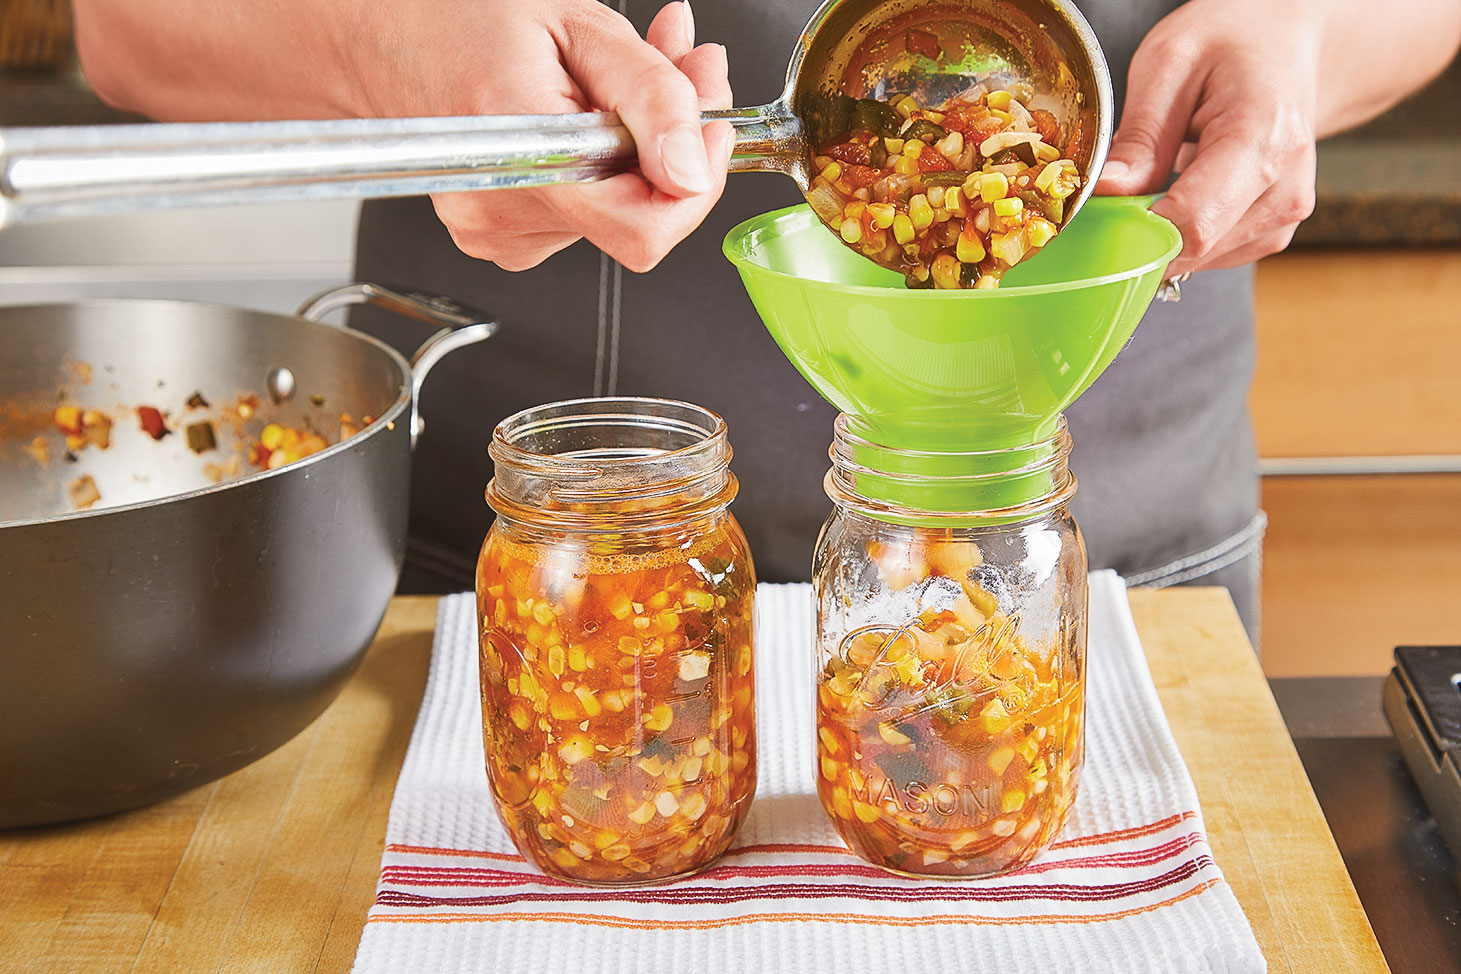
Step 4: Fill jars with prepared salsa, or tomatoes, using a wide-mouth funnel, making sure to leave a 1/2-inch headspace in the jars.
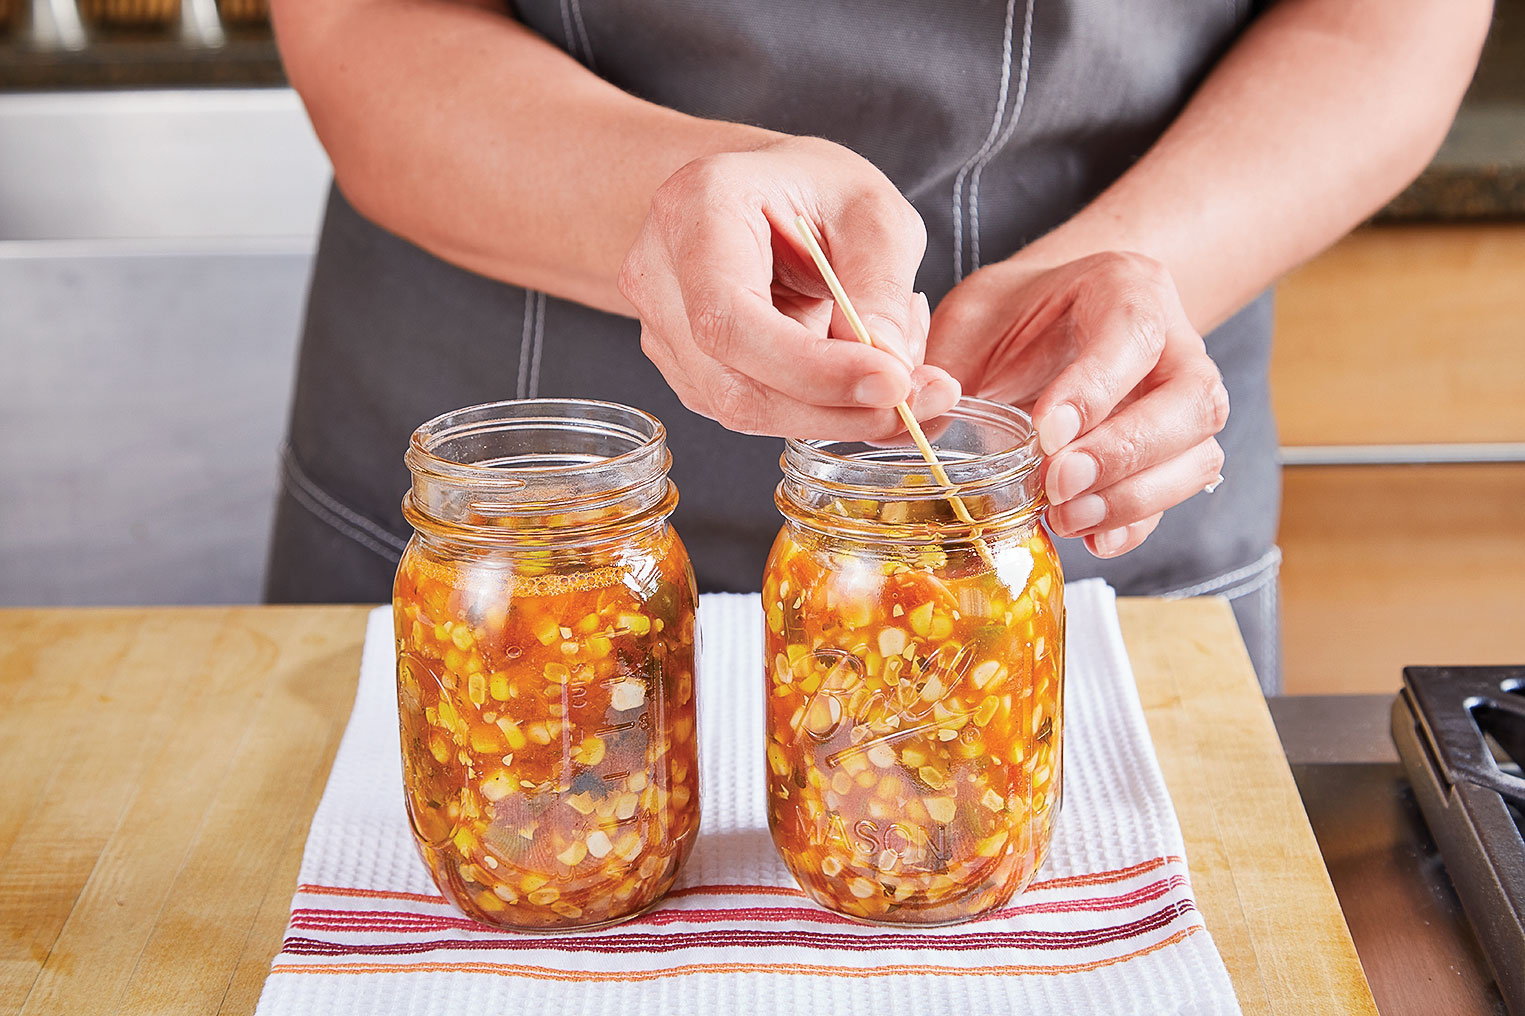
Step 5: Remove air bubbles by using a bubble freer, wooden skewer, or spatula between the jar and food to release trapped air.
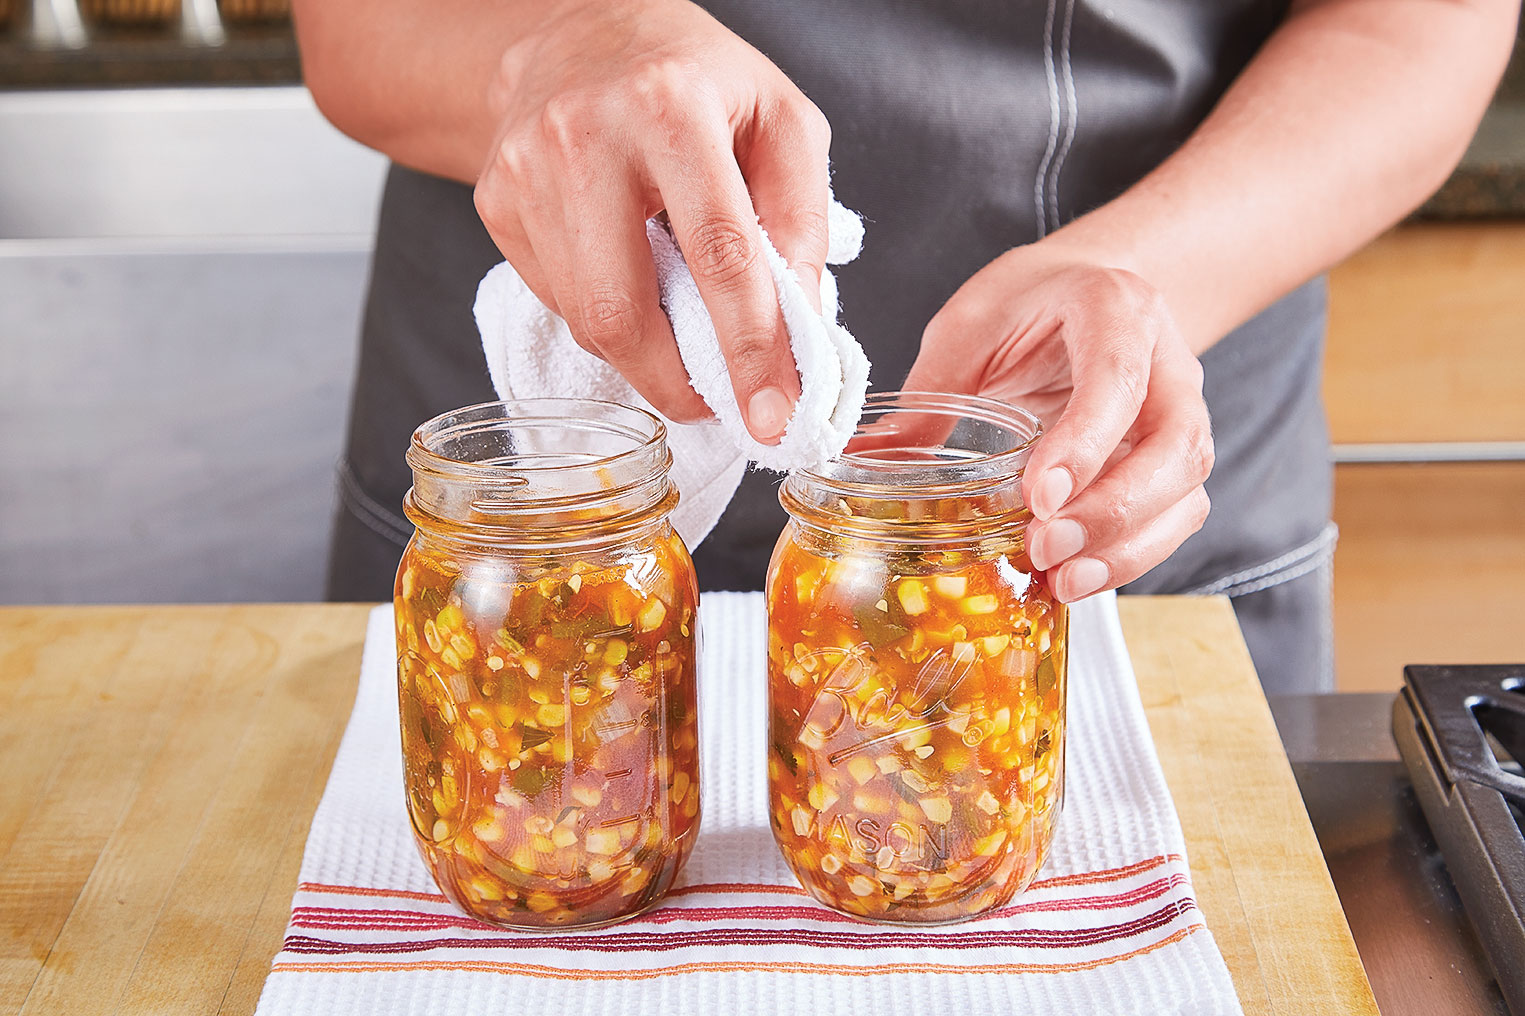
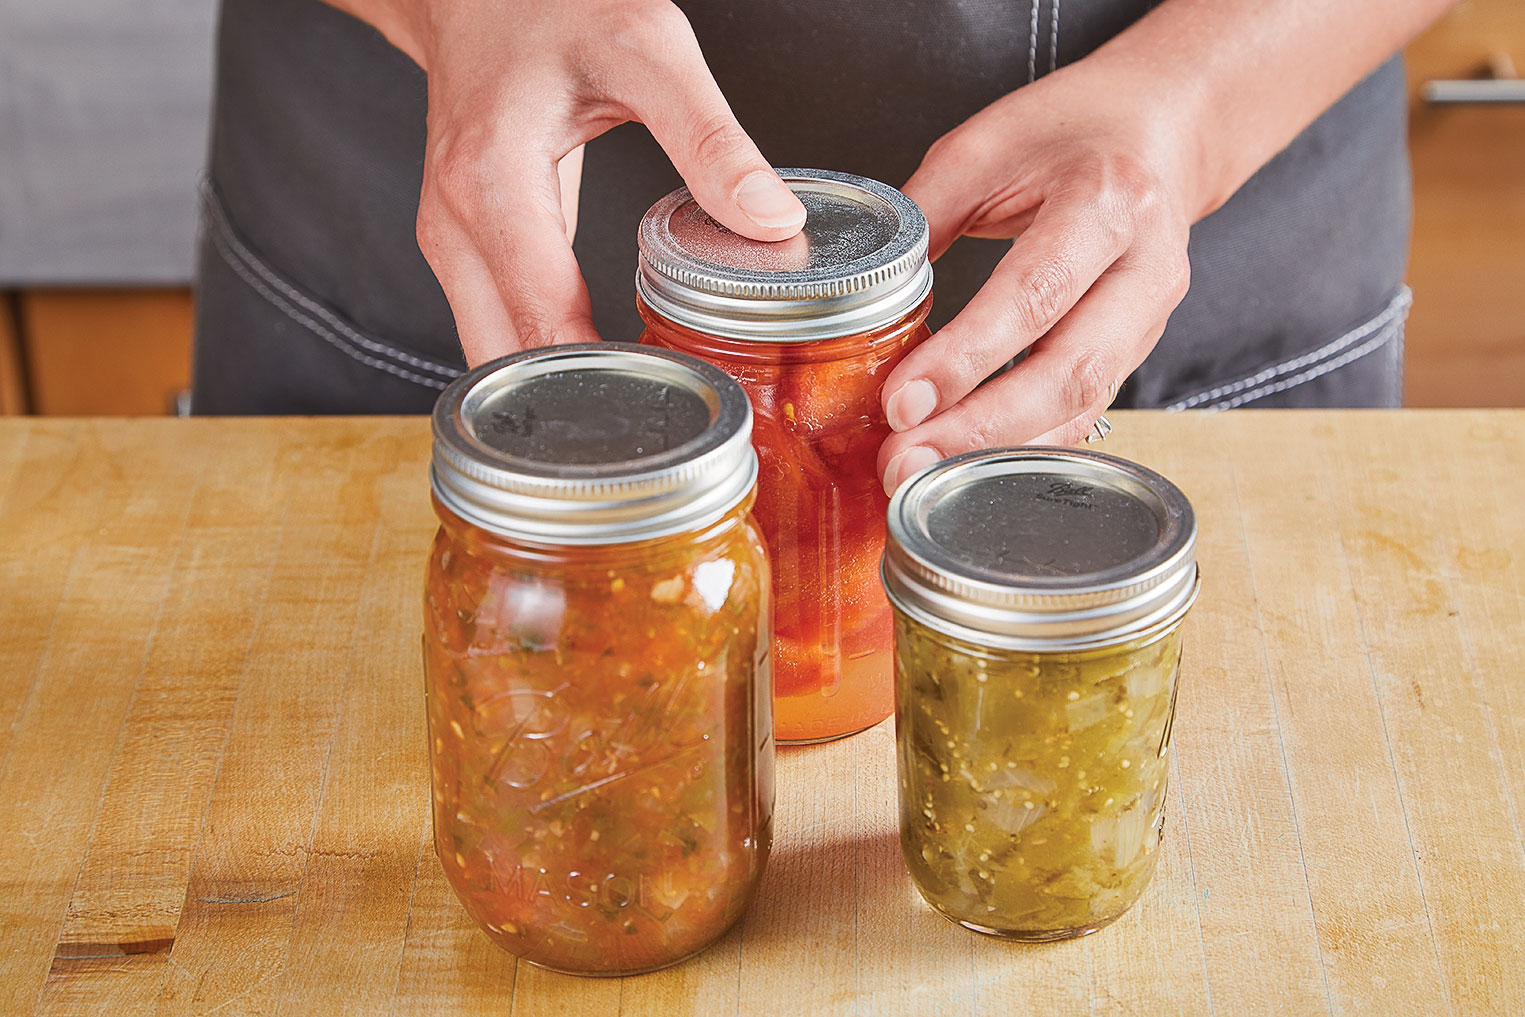
Step 6: Wipe rim and threads of the jars using a clean, damp cloth. Center lid on jar, and apply band until fingertip tight.
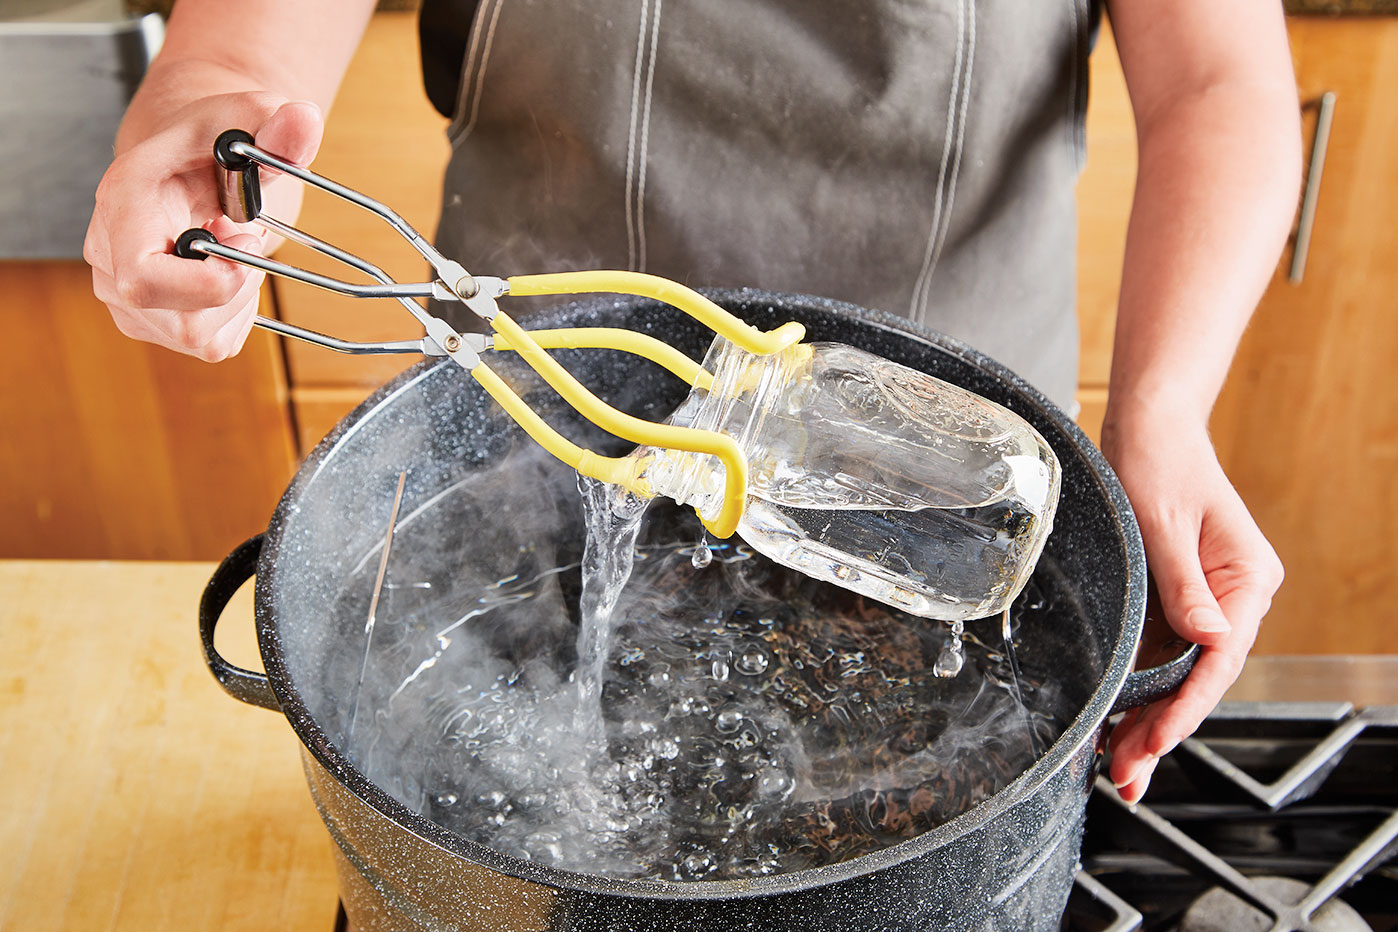
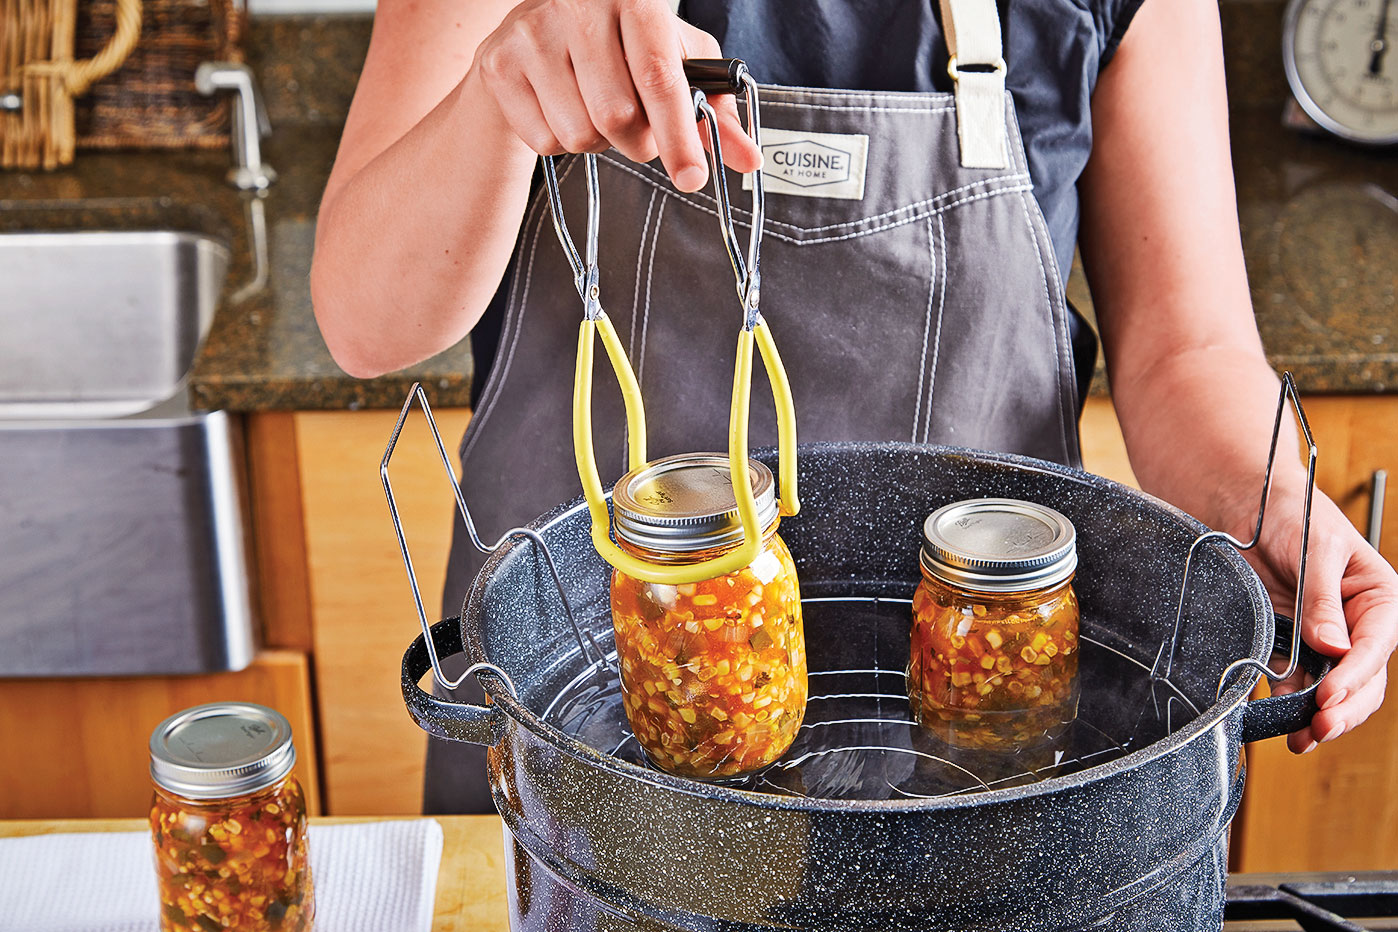
Step 7: Place prepared jars into canner, and ensure water covers jars by 1–2 inches. Place lid on canner, and bring to a boil.
Step 8: Process jars according to your recipe. Check seal after 24 hours; lids should not flex when pressed.
Grab the Recipes
Try your hand at canning with some of our favorite salsa recipes:
Product Recommendations
Interested in cooking? Need some supplies?
Check out some of the tools we like. All products featured on Cuisine at Home are independently selected by our editors; we may earn an affiliate commission from qualifying purchases through our links.